The ROS Command Line Interface
The ROS command line interface, or CLI for short, is a set of programs for starting, inspecting, controlling, and monitoring a ROS robot. The best way to think of the CLI is a collection of small and simple programs that allow you perform basic tasks in ROS. Drawing from our car analogy, the CLI can be thought of as the subsystems of a vehicle: the breaks, the transmission, the window wipers, all of the smaller parts that are composed together to build the larger vehicle. What we'll show you in this section is how to turn on the car, put it in gear, turn on the radio, and perhaps check your oil to perform routine maintenance. The ROS 2 CLI draws heavily from the Unix/Linux philosophy of small programs that can be composed together. If you are familiar with the command line interface found in Unix and Linux, or to a lesser extent in MacOS or Windows, you'll feel right at home.
The ROS command line tools draw heavily from the design patterns mentioned in the previous section, and directly interface with the APIs we will address in the next section. The CLI interface is at its core just a set of simple tools built from the ROS 2 API; this API is simply an implementation of the high-level patterns we discussed in the previous section. If your goal is to simply interface with a particular piece of software written using ROS, the CLI interface is the way you will go about starting, stopping, and controlling the underlying ROS software. For more advanced users these tools will allow you to study a ROS system by exploring the underlying software processes in the system.
There are only two things you need to memorize from this section. The first command simply tells your computer that you are using ROS, and what version of ROS you want to use. Let's take a look at the magic command:
source /opt/ros/eloquent/setup.bash
If everything is working correctly, this command should simply return. Nothing happens that you can see, but underneath the hood you've just told this particular shell that you are using ROS 2 Eloquent Elusor, and where all the ROS programs and files live. You should plan on doing this every time you want to use ROS. The most common mistake new users have is not running this command. If you're not sure if you ran the command in a shell, that's okay. The command is idempotent; running it twice in a row won't break anything. You can run it a million times in a row and it won't make any difference.
The other command you need to commit to memory is ros2. Almost everything in
the ROS 2 CLI starts with ros2. Go ahead and try it in the same shell where you just sourced the setup file.
If everything is working correctly you should see the following:
$ ros2
usage: ros2 [-h] Call `ros2 <command> -h` for more detailed usage. ...

ros2 is an extensible command-line tool for ROS 2.

optional arguments:
  -h, --help            show this help message and exit

Commands:
  action     Various action related sub-commands
  component  Various component related sub-commands
  daemon     Various daemon related sub-commands
  doctor     Check ROS setup and other potential issues
  interface  Show information about ROS interfaces
  launch     Run a launch file
  lifecycle  Various lifecycle related sub-commands
  msg        Various msg related sub-commands
  multicast  Various multicast related sub-commands
  node       Various node related sub-commands
  param      Various param related sub-commands
  pkg        Various package related sub-commands
  run        Run a package specific executable
  security   Various security related sub-commands
  service    Various service related sub-commands
  srv        Various srv related sub-commands
  topic      Various topic related sub-commands
  wtf        Use `wtf` as alias to `doctor`

  Call `ros2 <command> -h` for more detailed usage.
From this one command you can figure out what every single ROS 2 CLI program does and
how to use it. The ROS 2 CLI has a syntax just like most languages. All ROS CLI commands start
with ros2, followed by a command. After the command any number of other things
can come; you can append --help or -h to see the documentation and find out what arguments any of the commands are expecting.
The rest of this section just walks through each of the commands one by one.
Writing commands using the command line is tricky and error
prone. There are a couple of tools you can use to make the process much
smoother. The first is the TAB key, which attempts to auto complete whatever you type.
It can't read your mind, but for common command combinations you usually only need to type the
first one or two letters. Another tool is the up arrow key. When you use the
command line sometimes you mistype a command, or need to rerun a
command. Pressing the up key will cycle through the previous commands which you
can modify and rerun as needed.
Running Your First ROS Program
Let's get started with our first ROS CLI command. The first command we'll visit
is run. Let's start by looking at the documentation for the run command:
$ ros2 run
usage: ros2 run [-h] [--prefix PREFIX] package_name executable_name ...
ros2 run: error: the following arguments are required: package_name, executable_name, argv
To get more complete information about a ROS 2 command, simply ask the command for help by
adding --help to the command. Let's try that again:
$ ros2 run --help
usage: ros2 run [-h] [--prefix PREFIX] package_name executable_name ...

Run a package specific executable

positional arguments:
  package_name     Name of the ROS package
  executable_name  Name of the executable
  argv             Pass arbitrary arguments to the executable

optional arguments:
  -h, --help       show this help message and exit
  --prefix PREFIX  Prefix command, which should go before the executable.
                   Command must be wrapped in quotes if it contains spaces
                   (e.g. --prefix 'gdb -ex run --args').
We can see that ros2 run is the
command to, "Run a package specific executable." In ROS 2 collections of ROS
software are gathered into logical units called packages. Each package
contains all of the source code for the package as a variety of other data that
tells ROS how to build and compile the package and the names of all the
programs, also called executables, that can be found in the package. The line
below the description then gives the positional arguments for the
package. Positional arguments are the words and values that come after ros2
and the command you run. In this case the syntax for the command sentence we
want to write is as follows:
ros2 run <package name> <program/executable name> <args>
There is one piece of missing information here. What is this argv that the
command is asking for? The argv element is programmer short hand for variable
arguments, and it simply means, "some number of additional arguments that are
determined by the executable". It is worth noting that a program can have zero
arguments and you can just leave it blank. This is actually how a lot of
programs work. For example, say we had a package
called math, and an executable called add that takes in two numbers and
returns the result. In this case argv would be the two numbers to add. The
final command would look like:
ros2 run math add 1 2
Finally, below the positional arguments we have optional arguments. You don't need to included them, unless you need to.
Now that we've looked into our help file let's run our first ROS program. For
these tutorials we're going to use a package called turtlesim, and the program
we want to run is turtlesim_node. Let's run this program (remember your tab
complete!). Your command should look like the following:
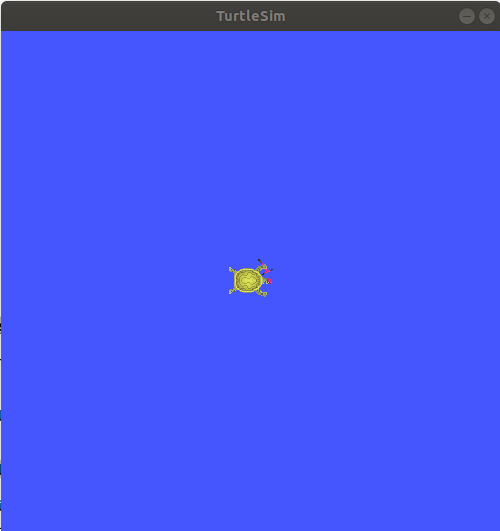
ros2 run turtlesim turtlesim_node
If everything goes smoothly you should see the following:
[INFO] [turtlesim]: Starting turtlesim with node name /turtlesim
[INFO] [turtlesim]: Spawning turtle [turtle1] at x=[5.544445], y=[5.544445], theta=[0.000000]
A window should also pop up with a cute little turtle that looks like the one below:
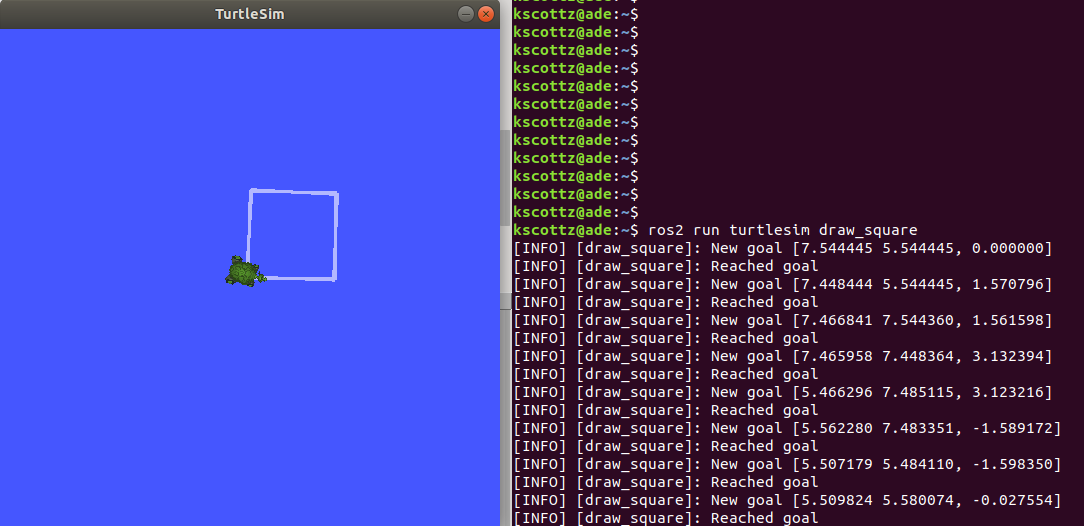
The real power in ROS isn't that it can run a program, it is that it can run lots of programs all at the same time, all talking together to control a robot, or multiple robots, all working together. To illustrate this let's run a second ROS program that makes our little turtle move around.
To do this we'll first open a new terminal (using CTRL-SHIFT-T). Next we'll
tell that terminal that we want to use ROS Eloquent by using the source command.
Finally, we'll run another program in the
turtlesim package to draw a square. See if you can find the program
yourself (hint: use TAB). If everything works you should have typed the following, and the
following output should be visible:
$ source /opt/ros/eloquent/setup.bash
$ ros2 run turtlesim draw_square
[INFO] [draw_square]: New goal [7.544445 5.544445, 0.000000]
[INFO] [draw_square]: Reached goal
[INFO] [draw_square]: New goal [7.448444 5.544445, 1.570796]
[INFO] [draw_square]: Reached goal
Your screen should look roughly like this:
It is worth noting that you can stop any ROS program by pressing the Ctrl and
C keys at the same time in the terminal; we call this CTRL-C (note that
CTRL-SHIFT-C and CTRL-SHIFT-V are responsible for copy and paste in a Linux terminal).
Feel free to try it out. Start and stop the programs, and then
restart them before moving on.
ROS Topics
We now have two ROS 2 programs running from the turtlesim package.
There is turtle_node that opens our turtle simulation, and draw_square
that makes the turtle in turtle_node move around. How are these two
programs communicating?
ROS programs, also called nodes, communicate over topics on the ROS message bus. ROS topics use namespaces to distinguish themselves. For example, in a vehicle running ROS, the positions of each wheel may be organized as follows:
/wheels/front/driver/velocity
/wheels/front/passenger/velocity
/wheels/rear/driver/velocity
/wheels/rear/passenger/velocity
The key thing to realize about topics is that the data they contain is dynamic, meaning it changes
constantly. In our vehicle example the velocity of each wheel might be measured
one thousand times a second or more. Since the data in a ROS topic is constantly
changing, an important distinction for a topic is whether the topic is "creating"
or as we like to say in ROS publishing, or if it is reading the data, what we call
subscribing to the topic. Many ROS nodes subscribe to one set of topics,
process that input data, and then publish to another set of topics.
Let's return to our turtlesim example and see if we can use the ROS CLI to
understand the topics, publishers, and subscribers.
To see sub commands and syntax for the topic command, we'll run: ros2 topic --help.
This command outputs the following:
$ ros2 topic --help
usage: ros2 topic [-h] [--include-hidden-topics]
                  Call `ros2 topic <command> -h` for more detailed usage. ...

Various topic related sub-commands

optional arguments:
  -h, --help            show this help message and exit
  --include-hidden-topics
                        Consider hidden topics as well

Commands:
  bw     Display bandwidth used by topic
  delay  Display delay of topic from timestamp in header
  echo   Output messages from a topic
  find   Output a list of available topics of a given type
  hz     Print the average publishing rate to screen
  info   Print information about a topic
  list   Output a list of available topics
  pub    Publish a message to a topic
  type   Print a topic's type

  Call `ros2 topic <command> -h` for more detailed usage.
There are quite a
few sub commands; we won't discuss all of them, but let's look closely at a few.
Sub commands have their
own help command. Why don't we examine the list command. Repeating our command
pattern let's try running ros2 topic list --help.
usage: ros2 topic list [-h] [--spin-time SPIN_TIME] [-t] [-c]
                       [--include-hidden-topics]

Output a list of available topics

optional arguments:
  -h, --help            show this help message and exit
  --spin-time SPIN_TIME
                        Spin time in seconds to wait for discovery (only
                        applies when not using an already running daemon)
  -t, --show-types      Additionally show the topic type
  -c, --count-topics    Only display the number of topics discovered
  --include-hidden-topics
                        Consider hidden topics as well
As indicated at the top of this command help file, ros2 topic list will
"Output a list of available topics." There appears to be a variety of
optional arguments that we don't need to include if we don't want to. However,
the -t, --show-types line looks interesting. It is worth noting that command
arguments, sometimes called flags, can have two types. A short form indicated
with a single dash ("-"), and a long form indicated by a double dash
("--"). Don't worry, despite looking different both versions of the argument do
the same thing. Let's try running this command, sub command pair with the
-show-types argument.
$ ros2 topic list --show-types
/parameter_events [rcl_interfaces/msg/ParameterEvent]
/rosout [rcl_interfaces/msg/Log]
/turtle1/cmd_vel [geometry_msgs/msg/Twist]
/turtle1/color_sensor [turtlesim/msg/Color]
/turtle1/pose [turtlesim/msg/Pose]
On the left hand side we see all of the ROS topics
running on the system, each starting with /. We can see that most of them are gathered in the
/turtle1/ group. This group defines all the inputs and outputs of the little
turtle on our screen. The words in brackets ([]) to the right of the topic
names define the messages used on the topic. Our car wheel example was
simple, we were only publishing velocity, but ROS allows you to publish more
complex data structures that are defined by a message type. When we added the
--show-types flag we told the command to include this information. We'll dig
into messages in detail a bit later.
One of the more commonly used topic sub commands is
info. Unsurprisingly, info provides info about a topic. Let's peek at its
help file using ros2 topic info --help
$ ros2 topic info --help
usage: ros2 topic info [-h] topic_name

Print information about a topic

positional arguments:
  topic_name  Name of the ROS topic to get info (e.g. '/chatter')

optional arguments:
  -h, --help  show this help message and exit
That seems pretty straight forward. Let's give it a go by running it on
/turtle1/pose
$ ros2 topic info /turtle1/pose
Type: turtlesim/msg/Pose
Publisher count: 1
Subscriber count: 1
What does this command tell us? First it tells us the message type for the
/turtle1/pose topic, which is /turtlesim/msg/Pose. From this we can determine that the
message type comes from the turtlesim package, and its type is Pose. ROS
messages have a predefined message type that can be shared by different
programming languages and between different nodes. We can also see that this
topic has a single publisher, that is to say a single node generating data on the
topic. The topic also has a single subscriber, also called a listener, who is
processing the incoming pose data.
If we only wanted to know the message type of a topic
there is a sub command just for that called, type. Let's take a look at its
help file and its result:
$ ros2 topic type --help
usage: ros2 topic type [-h] topic_name

Print a topic's type

positional arguments:
  topic_name  Name of the ROS topic to get type (e.g. '/chatter')

optional arguments:
  -h, --help  show this help message and exit
kscottz@kscottz-ratnest:~/Code/ros2multirobotbook$ ros2 topic type /turtle1/pose
turtlesim/msg/Pose
While it is not part of the topic command it is worthwhile for us to jump ahead
briefly and look at one particular command, sub command pair, namely the interface
command and the show sub command. This sub command will print all the
information related to a message type so you can better understand the data
being moved over a topic. In the previous example we saw that the topic type
sub command told us the /turtle1/pose topic has a type turtlesim/msg/Pose.
But what does turtlesim/msg/Pose data look like? We can look at the data
structure transferred by this topic by running the ros2 interface show
sub command and giving the message type name as an input. Let's look at the help
for this sub command and its output:
$ ros2 interface show --help
usage: ros2 interface show [-h] type

Output the interface definition

positional arguments:
  type        Show an interface definition (e.g. "std_msgs/msg/String")

optional arguments:
  -h, --help  show this help message and exit

$ ros2 interface show turtlesim/msg/Pose
float32 x
float32 y
float32 theta

float32 linear_velocity
float32 angular_velocity
We can see the values x and y which are the position coordinates of our turtle,
and that they are of type float32.
theta is the direction the head is pointing. The
next two values, linear_velocity and angular_velocity, are how
fast the turtle is moving and how quickly it is turning, respectively. To summarize, this
message tells us where a turtle is on the screen, where it is headed, and how
fast it is moving or rotating.
Now that we know what ROS topics are on our simple turtlesim, and their message
types, we can dig in and find out more about how everything works. If we look
back at our topic sub commands, we can see a sub command called echo. Echo is
computer jargon that means "repeat" something. If you echo a topic it means you
want the CLI to repeat what's on a topic. Let's look at the echo sub command's
help text:
$ ros2 topic echo --help
usage: ros2 topic echo [-h]
                       [--qos-profile {system_default,sensor_data,services_default,parameters,parameter_events,action_status_default}]
                       [--qos-reliability {system_default,reliable,best_effort}]
                       [--qos-durability {system_default,transient_local,volatile}]
                       [--csv] [--full-length]
                       [--truncate-length TRUNCATE_LENGTH] [--no-arr]
                       [--no-str]
                       topic_name [message_type]

Output messages from a topic

positional arguments:
  topic_name            Name of the ROS topic to listen to (e.g. '/chatter')
  message_type          Type of the ROS message (e.g. 'std_msgs/String')

optional arguments:
  -h, --help            show this help message and exit
  --qos-profile {system_default,sensor_data,services_default,parameters,parameter_events,action_status_default}
                        Quality of service preset profile to subscribe with
                        (default: sensor_data)
  --qos-reliability {system_default,reliable,best_effort}
                        Quality of service reliability setting to subscribe
                        with (overrides reliability value of --qos-profile
                        option, default: best_effort)
  --qos-durability {system_default,transient_local,volatile}
                        Quality of service durability setting to subscribe
                        with (overrides durability value of --qos-profile
                        option, default: volatile)
  --csv                 Output all recursive fields separated by commas (e.g.
                        for plotting)
  --full-length, -f     Output all elements for arrays, bytes, and string with
                        a length > '--truncate-length', by default they are
                        truncated after '--truncate-length' elements with
                        '...''
  --truncate-length TRUNCATE_LENGTH, -l TRUNCATE_LENGTH
                        The length to truncate arrays, bytes, and string to
                        (default: 128)
  --no-arr              Don't print array fields of messages
  --no-str              Don't print string fields of messages
Wow, that's a lot of features. The top of the help files says that this CLI
program "output[s] messages from a topic." As we scan the positional arguments we see one
required argument, a topic name, and an optional message type. We know the
message type is optional because it has square brackets ([]) around it. Let's
give the simple case a whirl before we address some of the optional
elements. Two things to keep in mind: first is that topics are long and easy to mess
up, so use the TAB key. Second is that this will print a lot of data, fast. You can
use CTRL-C to stop the command and stop all the output. Let's take a look at the
/turtle1/pose topic.
$ ros2 topic echo /turtle1/pose
x: 5.4078755378723145
y: 7.081490516662598
theta: -1.0670461654663086
linear_velocity: 1.0
angular_velocity: 0.0
---
x: 5.4155988693237305
y: 7.067478179931641
theta: -1.0670461654663086
linear_velocity: 1.0
angular_velocity: 0.0
---
x: 5.423322677612305
y: 7.053465843200684
theta: -1.0670461654663086
linear_velocity: 1.0
angular_velocity: 0.0
---
<<GOING ON FOREVER>>
Let's examine what is going on. Between the
dashes (---) is a single ROS message on our topic. If you examine the numbers
closely you can see that they are changing, and doing so in relation to the
movement of the turtle. Going back to our car example you can see how this would
be useful for understanding the instantaneous velocity of each of our wheels.
Now that we have the basics down let's dig into a few of the optional
arguments. We see a variety of commands that start with --qos. "QOS" here
means "quality of service" and it is a really cool feature that is only in
ROS 2. Without getting too technical, QOS is a way of asking for a certain level
of networking robustness. A ROS system can operate over a network, and just like
streaming video or video games, packets can get dropped or not get to their
destination. The OS settings help you control which packets are the most
important and should get the highest priority.
Most of the other commands deal with changing the output format of this CLI
program, but there is one in particular that is super handy, and it is also new
in ROS 2. The --csv flag stands for "comma separated values" and it a very
simple way of defining a spreadsheet. What this argument does is make the topic
echo command output data in the comma separate value format. Many command lines
allow you send data from the screen to a file, saving the data for later
review or analysis. To do this file saving in Linux we use the > character
followed by a file name. Below are two examples of using the --csv argument:
$ ros2 topic echo /turtle1/pose --csv
7.097168922424316,8.498645782470703,2.442624092102051,0.0,0.4000000059604645
7.097168922424316,8.498645782470703,2.449024200439453,0.0,0.4000000059604645
...
<<CTRL-C>>
$ ros2 topic echo /turtle1/pose --csv > mydata.csv
<<nothing happens>>
<<CTRL-C>>
The second command above creates a file called mydata.csv. You can look at it
using a CLI utility called less (press q to quit), or open it with your
favorite spreadsheet tool.
Now that we've looked at ros2 topic echo let's take a look at a few other
topic sub commands. One thing you may have noticed is that topics can output a lot
of data! More complex robots, like a self driving car, can saturate a high
speed internet connection with how much data it produces. There are two topic
sub commands that can be used to diagnose performance issues. The first
sub command is topic hz which is the abbreviation of Hertz, the unit of
frequency. The Hz sub command will
tell you how often a particular topic produces a message. Similarly there is
the topic bw sub command, where bw stands for bandwidth, which is a
engineering term related to the volume of data being produced. A high
bandwidth connection can move more data, like high definition video, than a low
bandwidth data, which might move a radio show. Let's take a look at the help
for these two commands:
$ ros2 topic hz --help
usage: ros2 topic hz [-h] [--window WINDOW] [--filter EXPR] [--wall-time]
                     topic_name

Print the average publishing rate to screen

positional arguments:
  topic_name            Name of the ROS topic to listen to (e.g. '/chatter')

optional arguments:
  -h, --help            show this help message and exit
  --window WINDOW, -w WINDOW
                        window size, in # of messages, for calculating rate
                        (default: 10000)
  --filter EXPR         only measure messages matching the specified Python
                        expression
  --wall-time           calculates rate using wall time which can be helpful
                        when clock is not published during simulation
$ ros2 topic bw --help
usage: ros2 topic bw [-h] [--window WINDOW] topic

Display bandwidth used by topic

positional arguments:
  topic                 Topic name to monitor for bandwidth utilization

optional arguments:
  -h, --help            show this help message and exit
  --window WINDOW, -w WINDOW
                        window size, in # of messages, for calculating rate
                        (default: 100)
Both bw and hz follow the same pattern, they simply take in a topic name
followed by a few optional arguments. The only argument worth noting is the
window argument. Both of these commands calculate statistics for a series of
messages; how many messages to use in calculating those statistics is the window
size. The default value for window is 100, so when you call ros2 topic bw it
will first collect 100 messages then use that data to calculate the average
message size. Let's give it a shot (use TAB to complete and CTRL-C to exit).
$ ros2 topic hz /turtle1/pose
average rate: 60.021
	min: 0.001s max: 0.073s std dev: 0.00731s window: 65
average rate: 61.235
	min: 0.001s max: 0.073s std dev: 0.00523s window: 128
$ ros2 topic bw /turtle1/pose
Subscribed to [/turtle1/pose]
average: 1.44KB/s
	mean: 0.02KB/s min: 0.02KB/s max: 0.02KB/s window: 46
average: 1.52KB/s
	mean: 0.02KB/s min: 0.02KB/s max: 0.02KB/s window: 100
As we can see above, the hz command says that the topic is publishing messages
at 60.021, where the unit is hz, or 60.021 times a second. Notice that the
command gives the publishing frequency as an average, followed by the minimum,
maximum, and standard deviation, in seconds. The bandwidth sub command is very
similar; and we can see that the topic is producing 1.44 kilobytes of data per
second. This command has similar outputs around the minimum, maximum, and mean.
One tool that is handy when exploring topics is understanding their type. While
we have already looked at the interface command to see what integral types make up
a topic, the topic command has both a tool to query the type of a topic, and a
means to search all topics for a specific type. If all you want to know is a
topic's type you can use the type command which will return a type that can
then be further explored with the interface command. If instead you would like
to know what topics use a particular message type you can use the topic find
command, sub command pair. Both the topic type and topic interface command,
sub command pairs have a very limited set of optional arguments, so we simply
provide them with our desired topic or message type. Let's take a look at these two commands together:
$ ros2 topic type --help
usage: ros2 topic type [-h] topic_name
Print a topic's type

positional arguments:
  topic_name  Name of the ROS topic to get type (e.g. '/chatter')

optional arguments:
  -h, --help  show this help message and exit
$ ros2 topic type /turtle1/pose
turtlesim/msg/Pose
$ ros2 topic find --help
usage: ros2 topic find [-h] [-c] [--include-hidden-topics] topic_type

Output a list of available topics of a given type

positional arguments:
  topic_type            Name of the ROS topic type to filter for (e.g.
                        'std_msg/msg/String')

optional arguments:
  -h, --help            show this help message and exit
  -c, --count-topics    Only display the number of topics discovered
  --include-hidden-topics
                        Consider hidden topics as wel
$ ros2 topic find  turtlesim/msg/Pose
/turtle1/pose
The last sub command for the topic command is pub, which simply means publish.
It allows you to publish a command to any ROS topic from the command
line. While you shouldn't need to use this command regularly it can be
particularly handy for testing and debugging when you are building a robot
system. The pub command has a number of optional arguments that allow you to
send one or more messages, and with different quality of service (QoS)
presets. The format of the command is ros2 topic pub TOPIC_NAME MESSAGE_TYPE VALUES, which means for it to work successfully you must include a
target topic, the topic's message type, and finally the message's values. The
values for the message are specified in the YAML format and we can use the
interface show command to understand the format. To illustrate the utility of this
command we'll issue a message to rotate and stop our turtle by publishing
to the /turtle1/cmd_vel/ topic. Let's first take a look at the topic pub
documentation before we construct our command:
$ ros2 topic pub --help
usage: ros2 topic pub [-h] [-r N] [-p N] [-1] [-n NODE_NAME]
                      [--qos-profile {system_default,sensor_data,services_default,parameters,parameter_events,action_status_default}]
                      [--qos-reliability {system_default,reliable,best_effort}]
                      [--qos-durability {system_default,transient_local,volatile}]
                      topic_name message_type [values]

Publish a message to a topic

positional arguments:
  topic_name            Name of the ROS topic to publish to (e.g. '/chatter')
  message_type          Type of the ROS message (e.g. 'std_msgs/String')
  values                Values to fill the message with in YAML format (e.g.
                        "data: Hello World"), otherwise the message will be
                        published with default values

optional arguments:
  -h, --help            show this help message and exit
  -r N, --rate N        Publishing rate in Hz (default: 1)
  -p N, --print N       Only print every N-th published message (default: 1)
  -1, --once            Publish one message and exit
  -n NODE_NAME, --node-name NODE_NAME
                        Name of the created publishing node
  --qos-profile {system_default,sensor_data,services_default,parameters,parameter_events,action_status_default}
                        Quality of service preset profile to publish with
                        (default: system_default)
  --qos-reliability {system_default,reliable,best_effort}
                        Quality of service reliability setting to publish with
                        (overrides reliability value of --qos-profile option,
                        default: system_default)
  --qos-durability {system_default,transient_local,volatile}
                        Quality of service durability setting to publish with
                        (overrides durability value of --qos-profile option,
                        default: system_default)
Since we want to manually move our turtle we will use the --once
flag to issue our command once. It is worth noting that the message type used to
command the velocity of the turtle is complex in that it is made up of other
message types so we'll have to query the base message type. Here's a rough summary of what we will do:
- Print the
cmd_veltopic type usingros2 topic type, which isgeometry_msgs/msg/Twist - Determine the structure of the
Twistmessage type usinginterface show. - Determine the structure of the
Vector3, which is part of theTwistmessage type usinginteface showcommand a second time. - Create the YAML syntax for our command. Note the YAML syntax below as it is
rather tricky! The YAML is wrapped in single quotes and a top level set of
curly braces, while subsequent levels follow the
pattern of
name:value, andname:{name1:val1,name2:val2}for nested types like theTwistcommand. - Issue the command using
ros2 pub.
$ ros2 topic type /turtle1/cmd_vel
geometry_msgs/msg/Twist
$ ros2 interface show geometry_msgs/msg/Twist
# This expresses velocity in free space broken into its linear and angular parts.

Vector3  linear
Vector3  angular
$ ros2 interface show geometry_msgs/msg/Vector3
# This represents a vector in free space.

float64 x
float64 y
float64 z

$ ros2 topic pub --once /turtle1/cmd_vel geometry_msgs/msg/Twist '{linear: {x: 4.0,y: 4.0, z: 0.0}, angular: {x: 0.0, y: 0.0, z: 0.0}}'
If you did everything correctly you should have moved around the turtle on the screen. Try changing the command to draw a small picture.
ROS 2 Services and Actions
As discussed previously, services are the name given to short, synchronous robot behaviors that can be done quickly, like turning on lights and switching components on or off. Actions are longer term, asynchronous, tasks that may have intermediate steps. A classic example of an action is navigation: a robot is provided a goal position and asked to navigate to that goal. Try as the robot might, since it cannot move infinitely fast, it takes time to move to a goal and sometimes its path may become blocked.
These two primitives are the backbone of most robotic systems using ROS, and learning
how to use them via the command line will allow you quickly and easily command
a robot to complete a task for you. To aid in clarity of this section we'll
also touch on the ros2 node command to determine what node, or software
process, is conducting a particular action or service.
Let's get nodes out of the way quickly. ROS nodes are
small programs, running in their own process. A ROS system can have ten,
hundreds, or even thousands of nodes running concurrently. Moreover, a ROS
system can have multiple copies of the same node running concurrently on the
same system. In the case of our turtle simulation we can actually create
multiple turtles, each with their own node, all running the exact same
program. ROS Nodes, like ROS topics, have namespaces so that you can address
specific nodes in the case where multiple copies of the same node (program) are
running. Let's dig in a bit by restarting our turtle simulation in a terminal
using ros2 run turtlesim turtlesim_node. Now in a new terminal let's first
examine what ros2 node has to offer by asking for help.
$ ros2 node --help
usage: ros2 node [-h]
                 Call `ros2 node <command> -h` for more detailed usage. ...

Various node related sub-commands

optional arguments:
  -h, --help            show this help message and exit

Commands:
  info  Output information about a node
  list  Output a list of available nodes

  Call `ros2 node <command> -h` for more detailed usage.
Much like topics, we see two sub commands, info and list. node list works much the
same as topic list and simply prints a list of all running nodes. Let's see what
is running on our system:
$ ros2 node list
/turtlesim
We have a single node running called "turtlesim". node info works in a way
very similar to topic info except that it lists information about the nodes we
give it. Let's call it with our single ROS Node /turtlesim as its
argument:
$ ros2 node info /turtlesim
/turtlesim
  Subscribers:
    /parameter_events: rcl_interfaces/msg/ParameterEvent
    /turtle1/cmd_vel: geometry_msgs/msg/Twist
  Publishers:
    /parameter_events: rcl_interfaces/msg/ParameterEvent
    /rosout: rcl_interfaces/msg/Log
    /turtle1/color_sensor: turtlesim/msg/Color
    /turtle1/pose: turtlesim/msg/Pose
  Service Servers:
    /clear: std_srvs/srv/Empty
    /kill: turtlesim/srv/Kill
    /reset: std_srvs/srv/Empty
    /spawn: turtlesim/srv/Spawn
    /turtle1/set_pen: turtlesim/srv/SetPen
    /turtle1/teleport_absolute: turtlesim/srv/TeleportAbsolute
    /turtle1/teleport_relative: turtlesim/srv/TeleportRelative
    /turtlesim/describe_parameters: rcl_interfaces/srv/DescribeParameters
    /turtlesim/get_parameter_types: rcl_interfaces/srv/GetParameterTypes
    /turtlesim/get_parameters: rcl_interfaces/srv/GetParameters
    /turtlesim/list_parameters: rcl_interfaces/srv/ListParameters
    /turtlesim/set_parameters: rcl_interfaces/srv/SetParameters
    /turtlesim/set_parameters_atomically: rcl_interfaces/srv/SetParametersAtomically
  Service Clients:

  Action Servers:
    /turtle1/rotate_absolute: turtlesim/action/RotateAbsolute
  Action Clients:
Wow, that's a lot of information, some of which looks familiar. We can see all the topics that the node subscribes to, as well as all the nodes it publishes to. We can also see a number of "action servers" and "service servers". It is worth noting the client and server relationship here. Since ROS may have multiple nodes running some nodes may offer services (these are servers), and other ROS nodes may call those servers (these are the clients). The clients can be other ROS nodes, or for these examples, a human using the CLI.
The command line interface for services and actions are very similar, in fact
they both have only four sub commands. Let's run the action and service
commands and compare them:
$ ros2 action --help
usage: ros2 action [-h]
                   Call `ros2 action <command> -h` for more detailed usage.
                   ...

Various action related sub-commands

optional arguments:
-h, --help            show this help message and exit

Commands:
  info       Print information about an action
  list       Output a list of action names
  send_goal  Send an action goal
  show       Output the action definition

  Call `ros2 action <command> -h` for more detailed usage.
$ ros2 service --help
usage: ros2 service [-h] [--include-hidden-services]
                    Call `ros2 service <command> -h` for more detailed usage.
                    ...

Various service related sub-commands

optional arguments:
  -h, --help            show this help message and exit
  --include-hidden-services
                        Consider hidden services as well

Commands:
  call  Call a service
  find  Output a list of available services of a given type
  list  Output a list of available services
  type  Output a service's type

  Call `ros2 service <command> -h` for more detailed usage.
We can see that both commands have a list command that gives a list of
available services or actions. If we had multiple nodes running and wanted to
see every service offered, calling ros2 node info on each node would be very
inefficient, particularly if we had tens, or even hundreds of nodes running.
In this case it would be much more efficient to use the list commands for the
action and service commands. We can run these commands below and see that we get
roughly the same list of actions and services listed in our single nodes:
$ ros2 service list
/clear
/kill
/reset
/spawn
/turtle1/set_pen
/turtle1/teleport_absolute
/turtle1/teleport_relative
/turtlesim/describe_parameters
/turtlesim/get_parameter_types
/turtlesim/get_parameters
/turtlesim/list_parameters
/turtlesim/set_parameters
/turtlesim/set_parameters_atomically
kscottz@kscottz-ratnest:~$ ros2 action list
/turtle1/rotate_absolute
Let's begin digging into services. There seem to be quite a few services
listed. Let's take a look at the /spawn service, which will create more
turtles. ROS services and actions use messages similar to those used in topics
to communicate. In fact, actions and services are built on top of messages.
We can use the service type sub command to determine the message type
used by a particular service. We can find specifics of the message by using the
interface show command. Let's see this in practice with the spawn service:
$ ros2 service type /spawn
turtlesim/srv/Spawn
$ ros2 interface show turtlesim/srv/Spawn
float32 x
float32 y
float32 theta
string name # Optional.  A unique name will be created and returned if this is empty
---
string name
We can see from the output above that the spawn message takes three float32
values for its position and orientation as well a string for its name. The
--- indicate the return value of the services. Unlike topics, services have
a return value, which enables them to do things like perform computations and
calculations.
Let's examine the help for calling a service by running ros2 service call --help:
$ ros2 service call --help
usage: ros2 service call [-h] [-r N] service_name service_type [values]

Call a service

positional arguments:
  service_name    Name of the ROS service to call to (e.g. '/add_two_ints')
  service_type    Type of the ROS service (e.g. 'std_srvs/srv/Empty')
  values          Values to fill the service request with in YAML format (e.g.
                  "{a: 1, b: 2}"), otherwise the service request will be
                  published with default values

optional arguments:
  -h, --help      show this help message and exit
  -r N, --rate N  Repeat the call at a specific rate in Hz
The syntax here is very similar to publishing to a topic, but instead of using a
a topic name we use a service name. The service type is just like the topic type
that we used in the past, but instead of using a message type we need a service
type. Finally we give it a value in YAML format. A YAML string must be encased
in single quotes. Let's try calling a service by creating a turtle
named Larry at a position where all values are zero (use TAB complete).
$ ros2 service call /spawn turtlesim/srv/Spawn "{x: 0, y: 0, theta: 0.0, name: 'Larry'}"
requester: making request: turtlesim.srv.Spawn_Request(x=0.0, y=0.0, theta=0.0, name='Larry')

response:
turtlesim.srv.Spawn_Response(name='Larry')
If everything is working correctly you should now have a turtle named "Larry" in the lower left hand corner of the screen:
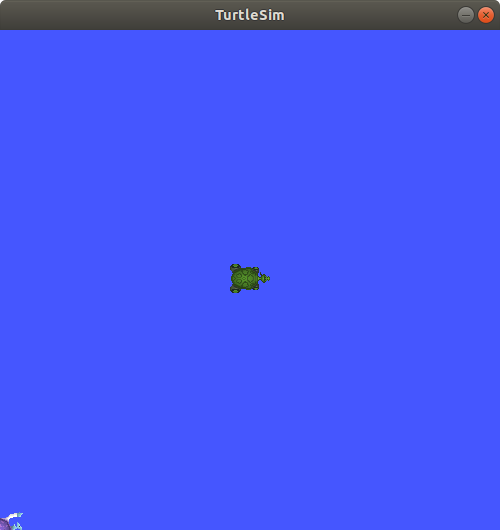
Try exploring the other services offered, or creating more turtles at different locations and moving them around.
Let's move on to actions. As mentioned previously, actions differ from services in a few ways and offer a number of advantages. Actions have the following advantages:
- Actions have a
goal. That is to say you send them a goal, and they attempt to complete it. - Actions can reject goal requests. This prevents them from becoming too busy.
- Actions are asynchronous and can perform tasks "while you wait."
- Actions will provide you with "updates" with information about their progress while you wait.
- Actions are preemptable, meaning you can cancel them if you change your mind.
Just like with services, we'll first figure out how to call the sole action in
our ROS system by using the action list, action show, and action info
commands. Recall, that when we called ros2 action list we got a single
service. Now that we have Larry things have changed. Let's take a look:
$ ros2 action list
/Larry/rotate_absolute
/turtle1/rotate_absolute
Now there are two actions available, one for Larry and one for turtle1.
Let's rotate turtle1 to face Larry. First we'll call action info
using /turtle1/rotate_absolute as the input and see what we get:
$ ros2 action info /turtle1/rotate_absolute
Action: /turtle1/rotate_absolute
Action clients: 0
Action servers: 1
    /turtlesim
Well, that tells us about the client and servers, but it really isn't
helpful for our goal of moving Larry. Why don't we look at the action send_goal help and see if we can
figure out how to use it:
$ ros2 action send_goal --help
usage: ros2 action send_goal [-h] [-f] action_name action_type goal

Send an action goal

positional arguments:
  action_name     Name of the ROS action (e.g. '/fibonacci')
  action_type     Type of the ROS action (e.g.
                  'example_interfaces/action/Fibonacci')
  goal            Goal request values in YAML format (e.g. '{order: 10}')

optional arguments:
  -h, --help      show this help message and exit
  -f, --feedback  Echo feedback messages for the goal
This command needs an action name, an action type, and a goal in YAML. We know the action name, and we know how to write YAML, so all we need is to determine the action type. The best way to get the action type is the same way we published a message.
We see each of our turtles have one service called rotate_absolute.
Let's dig into this action using the info sub command. This command has a -t
flag to list the types of messages.
$ ros2 action info /turtle1/rotate_absolute -t
Action: /turtle1/rotate_absolute
Action clients: 0
Action servers: 1
  /turtlesim [turtlesim/action/RotateAbsolute]
The first line lists the action
name. The second line gives the current number of clients for the
action. The Action servers line gives the total number of action
servers for this action. The last line gives the package and message
type for the action.
We can see here that we need to know the action name, the type, and the values. Now the only problem is figuring out the format of the action type.
Let's understand the RotateAbsolute action message
The ros2 interface show command can be used to find the type of action
message. Let's take a look:
$ ros2 interface show turtlesim/action/RotateAbsolute
# The desired heading in radians
float32 theta #< --- This section is the GOAL
---
# The angular displacement in radians to the starting position
float32 delta #< --- This section is the final result, different from the goal.
---
# The remaining rotation in radians
float32 remaining # < --- This is the current state.
What does this say about rotate absolute?
- There is a float input,
theta, the desired heading. This first section is the actual goal. deltais the angle from the initial heading. This is the value returned when the action completes.remainingis the remaining radians to move. This is the value posted by the action while the action is being done.
With this information we can create our call to the action server. We'll
use the -f flag to make this a bit clearer. Keep an eye on your turtle! It should move, slowly.
$ ros2 action send_goal -f /turtle1/rotate_absolute turtlesim/action/RotateAbsolute {'theta: 1.70'}
Waiting for an action server to become available...
Sending goal:
  theta: 1.7

Feedback:
  remaining: 0.11599969863891602

Goal accepted with ID: 35c40e91590047099ae5bcc3c5151121

Feedback:
 remaining: 0.09999966621398926

Feedback:
 remaining: 0.06799960136413574

Feedback:
 remaining: 0.03599953651428223

Result:
 delta: -0.09600019454956055

Goal finished with status: SUCCEEDED
If everything worked correctly we should see our turtle has rotated.
ROS Parameters
In ROS, parameters are values that are shared between nodes in the system (if you are familiar with the blackboard design pattern in software engineering). Parameters are values that any node can query or write to. Another good analogy would be global constants in normal software programs. Parameters are best used to configure your robot. For example, if you were building an autonomous vehicle and wanted to cap the maximum velocity of the vehicle at 100 km/h, you could create a parameter called "MAX_SPEED" that is visible to all the nodes.
Let's take a look at the param command by running ros2 param --help.
$ ros2 param --help
Various param related sub-commands

Commands:
  delete  Delete parameter
  get     Get parameter
  list    Output a list of available parameters
  set     Set parameter
  Call `ros2 param <command> -h` for more detailed usage.
At a high level, ROS 2's param command has sub commands to get and set a variable,
along with a list functionality, and a delete command. As with most of the
other commands we've worked through, it is instructive to look at list
first. Let's see what the docs say about the list command and then see what
happens when we call the sub command:
$ ros2 param list --help
usage: ros2 param list [-h] [--spin-time SPIN_TIME] [--include-hidden-nodes]
                       [--param-prefixes PARAM_PREFIXES [PARAM_PREFIXES ...]]
                       [node_name]

Output a list of available parameters

positional arguments:
  node_name             Name of the ROS node

optional arguments:
  -h, --help            show this help message and exit
  --spin-time SPIN_TIME
                        Spin time in seconds to wait for discovery (only
                        applies when not using an already running daemon)
  --include-hidden-nodes
                        Consider hidden nodes as well
  --param-prefixes PARAM_PREFIXES [PARAM_PREFIXES ...]
                        Only list parameters with the provided prefixes
$ ros2 param list
/turtlesim:
  background_b
  background_g
  background_r
  use_sim_time
The only argument of note in this sub command is the node_name which allows
you to narrow the scope of param list to only those parameters used by a particular
node. In terms of parameters in the turtlesim node, we see that our call to param list gives us: three background color control params named
background_x and a use_sim_time parameter. To learn all about the param
command why don't we try to change these background color parameters using the
CLI.
The first step in changing the background color is to see what the current color
is. The param get sub command requires both a node name and a parameter
name. In our list above we can see the node name as the top level element with
the forward slash in front of it, namely /turtlesim. The syntax for param get is ros2 param get <node_name> <param>. Let's give it a whirl and see our
current background color values.
$ ros2 param get /turtlesim background_b
Integer value is: 255
$ ros2 param get /turtlesim background_g
Integer value is: 86
$ ros2 param get /turtlesim background_r
Integer value is: 69
On most computers color is represented as a triplet of <R,G,B> values. The color value of <69,86,255> corresponds to a periwinkle blue color. To change the color of the turtlesim we need to first set the parameter value and then reset the turtlesim to make it apply the color changes. We covered the basics of calling a service previously so we won't cover the steps of constructing a service call. Let's try setting our background color's blue component to 128.
$ ros2 param set turtlesim background_b 128
Set parameter successful
$ ros2 service call /reset std_srvs/srv/Empty
requester: making request: std_srvs.srv.Empty_Request()

response:
std_srvs.srv.Empty_Response()
If everything worked correctly your turtle should look like the screen below.

ROS Bags
ROS bags are ROS's tool for recording, and replaying data. ROS bags are like log files that let you store data along with messages. ROS systems can generate a lot of data, so when you bag data you must select which topics you want. Bags are a great tool for testing and debugging your application and a great tool for building robust unit tests.
Let's take a look at the root ROS Bag command by typing ros2 bag --help into
the terminal. If you get an error you might need to install ROS Bag as it is
often in a separate package. On Linux you can run sudo apt install ros-eloquent-ros2bag and it should automatically install the package for you.
$ ros2 bag -h
usage: ros2 bag [-h] Call `ros2 bag <command> -h` for more detailed usage. ...

Various rosbag related sub-commands

Commands:
  info    ros2 bag info
  play    ros2 bag play
  record  ros2 bag record
As you can see there are three sub commands, record, play, and info. With these
commands you can record a bag file, play/replay a file you've recorded, and find information about a bag file.
Let's try recording our first bag file. To do this we'll need three terminals all
running ROS. The first terminal should already have our turtlesim running. If it
isn't running you can restart it with ros2 run turtlesim turtlesim_node. Next
you'll need to start the draw_square demo again to get the default turtle
moving. To do this run ros2 run turtlesim draw_square. Now, in a third
terminal we can bag some data by running the bag command. Let's first look at
the record sub command by running ros2 bag record -h
$ ros2 bag record -h
usage: ros2 bag record [-h] [-a] [-o OUTPUT] [-s STORAGE]
                       [-f SERIALIZATION_FORMAT] [--no-discovery]
                       [-p POLLING_INTERVAL] [-b MAX_BAG_SIZE]
                       [topics [topics ...]]

ros2 bag record

positional arguments:
  topics                topics to be recorded

optional arguments:
  -h, --help            show this help message and exit
  -a, --all             recording all topics, required if no topics are listed
                        explicitly.
  -o OUTPUT, --output OUTPUT
                        destination of the bagfile to create, defaults to a
                        timestamped folder in the current directory
  -s STORAGE, --storage STORAGE
                        storage identifier to be used, defaults to "sqlite3"
  -f SERIALIZATION_FORMAT, --serialization-format SERIALIZATION_FORMAT
                        rmw serialization format in which the messages are
                        saved, defaults to the rmw currently in use
  --no-discovery        disables topic auto discovery during recording: only
                        topics present at startup will be recorded
  -p POLLING_INTERVAL, --polling-interval POLLING_INTERVAL
                        time in ms to wait between querying available topics
                        for recording. It has no effect if --no-discovery is
                        enabled.
  -b MAX_BAG_SIZE, --max-bag-size MAX_BAG_SIZE
                        maximum size in bytes before the bagfile will be
                        split. Default it is zero, recording written in single
                        bagfile and splitting is disabled.
We can see from the help file that the syntax for recording a bag is to simply
give the sub command a list of topics to record. Most of the other arguments are
for more advanced users to help configure how and when data is stored. It is
worth noting that there is a -a, --all command that records all the data. You
can also specify the output bag file with the -o, --output command.
Let's go ahead and run our bag command, and let's bag the pose data on the
/turtle1/pose topic and save it to the file turtle1.bag using the -o
flag. Be aware that the program will continue bagging data until you hit
CTRL-C, so give the command a good 30 seconds to collect data before you kill
it.
$ ros2 bag record /turtle1/pose -o turtle1
[INFO] [rosbag2_storage]: Opened database 'turtle1'.
[INFO] [rosbag2_transport]: Listening for topics...
[INFO] [rosbag2_transport]: Subscribed to topic '/turtle1/pose'
[INFO] [rosbag2_transport]: All requested topics are subscribed. Stopping discovery...
^C[INFO] [rclcpp]: signal_handler(signal_value=2)
Now that we collected our data let's inspect our bag file. You can introspect
any bag file using the ros2 bag info command. This command will list the
messages in the bag, the duration of file, and the number of messages.
$ ros2 bag info turtle1
Files:             turtle1.db3
Bag size:          268.4 KiB
Storage id:        sqlite3
Duration:          68.705s
Start:             May  4 2020 16:10:26.556 (1588633826.556)
End                May  4 2020 16:11:35.262 (1588633895.262)
Messages:          4249
Topic information: Topic: /turtle1/pose | Type: turtlesim/msg/Pose | Count: 4249 | Serialization Format: cdr
Once you have collected a bag file you can replay the file just like a running system. Bags are a great tool for debugging and testing. You can treat a ROS bag like a recording of a running ROS system. When you play a bag file you can use most of the ros2 CLI tools to inspect the recorded topics.
To replay the bag, first use CTRL-C to turn off the
turtlesim_node and the draw_square node. Now in a new terminal replay the bag
file using the following command:
$ ros2 bag play turtle1
[INFO] [rosbag2_storage]: Opened database 'turtle1'.
Nothing should happen visibly, but a lot is happening under the hood.
To see what is happening go to a second terminal. Just like a running robot,
you should be able to list and echo topics:
$ ros2 topic list
/parameter_events
/rosout
/turtle1/pose

$ ros2 bag info turtle1
x: 3.8595714569091797
y: 3.6481313705444336
theta: -1.2895503044128418
linear_velocity: 1.0
angular_velocity: 0.0
---
ROS2 Component Command
ROS2 Daemon Command
ROS2 Doctor Command
With any complex system problems can sometimes arise, and knowing how to describe your
system and what is happening can do a lot to help others help you fix your
problem. ROS 2 has a doctor command that you can use to print a variety of
reports that you can use to help communicate the state of your system to others
trying to provide help. Whether it is one of your co-workers, a vendor, or an
on-line forum, providing detailed and complete information about your ROS system
can go a long way to solving your problem. Let's call --help on the ROS 2
doctor command:
$ ros2 doctor --help
usage: ros2 doctor [-h] [--report | --report-failed] [--include-warnings]

Check ROS setup and other potential issues

optional arguments:
  -h, --help            show this help message and exit
  --report, -r          Print all reports.
  --report-failed, -rf  Print reports of failed checks only.
  --include-warnings, -iw
                        Include warnings as failed checks. Warnings are
                        ignored by default.
As we can see from the help file we have a couple of report options. One option
is to print the full report with -r, or just what failed with -rf. If you're
running ros2 doctor -r you should see a fairly lengthy report generated giving
information about your computer's operating system, your networking
configuration, and your running ROS system. If you ever run into an issue you
should always include this full report.
ROS 2 Interface
As you've already seen, ROS uses standard messages so that different packages and programs, potentially written in different programming languages, can all talk to one another. To make this all work, ROS uses standard messages, and communication protocols built on top of those standard messages. This can make finding type information about a particular message, service, or action difficult. To help developers write both CLI command calls and develop client code, the ROS CLI has the interface command. We've touched on this command briefly in other sections, as it is the go to tool for message type information.
To better understand the interface command let's start by looking at its high
level help command to see what sub commands are available:
$ ros2 interface --help
usage: ros2 interface [-h]
                      Call `ros2 interface <command> -h` for more detailed
                      usage. ...

Show information about ROS interfaces

optional arguments:
  -h, --help            show this help message and exit

Commands:
  list      List all interface types available
  package   Output a list of available interface types within one package
  packages  Output a list of packages that provide interfaces
  proto     Output an interface prototype
  show      Output the interface definition

  Call `ros2 interface <command> -h` for more detailed usage.
The interface command are all geared towards helping you understand
available message types. Let's examine the list sub command in depth. list
will list all of the available messages, services, and actions on your
system. This command has flags that can help you narrow down the scope of your
search. Even a basic ROS installation has a lot of messages, so a tool you
should get familiar with is grep. grep lets you search through some text to
find what you are looking for quickly and easily. You can grep in a case
insensitive manner using the -i flag followed by the text you want to search
for. We can tie this CLI tool to our interface tool by using the UNIX pipe operator |. The example below
shows you how to use the list operation and then how to use it to search:
$ ros2 interface list --only-msgs
Messages:
    action_msgs/msg/GoalInfo
    action_msgs/msg/GoalStatus
	... <DOZENS OF DIFFERENT TYPES> ...
	visualization_msgs/msg/MarkerArray
    visualization_msgs/msg/MenuEntry
$ ros2 interface list --only-msgs | grep -i point
    geometry_msgs/msg/Point
    geometry_msgs/msg/Point32
    geometry_msgs/msg/PointStamped
    map_msgs/msg/PointCloud2Update
    pcl_msgs/msg/PointIndices
    rcl_interfaces/msg/FloatingPointRange
    sensor_msgs/msg/PointCloud
    sensor_msgs/msg/PointCloud2
    sensor_msgs/msg/PointField
    trajectory_msgs/msg/JointTrajectoryPoint
Using grep to search through CLI output is a common tactic used by developers to
find just the specific information they need. The next two sub commands
package and packages can be used to first determine what ROS packages are on
your system, and then to drill down into an individual package to determine what
messages are in that package. Note that
you can use grep just like before to search for your specific interest. The
example below shows you how to first determine if std_msgs is installed and
then to find out what sort of array types it contains:
$ ros2 interface packages
action_msgs
action_tutorials_interfaces
actionlib_msgs
builtin_interfaces
composition_interfaces
diagnostic_msgs
example_interfaces
geometry_msgs
lifecycle_msgs
logging_demo
map_msgs
nav_msgs
pcl_msgs
pendulum_msgs
rcl_interfaces
rosgraph_msgs
rqt_py_common
sensor_msgs
shape_msgs
std_msgs
std_srvs
stereo_msgs
tf2_msgs
trajectory_msgs
turtlesim
unique_identifier_msgs
visualization_msgs
kscottz@kscottz-ratnest:~/Code/ros2multirobotbook/src$ ros2 interface package std_msgs | grep -i array
std_msgs/msg/Int8MultiArray
std_msgs/msg/Int32MultiArray
std_msgs/msg/MultiArrayLayout
std_msgs/msg/UInt64MultiArray
std_msgs/msg/Float32MultiArray
std_msgs/msg/UInt16MultiArray
std_msgs/msg/UInt32MultiArray
std_msgs/msg/Int16MultiArray
std_msgs/msg/ByteMultiArray
std_msgs/msg/Int64MultiArray
std_msgs/msg/Float64MultiArray
std_msgs/msg/UInt8MultiArray
std_msgs/msg/MultiArrayDimension
The next two commands are particularly
helpful and you should remember them as they will make your life much easier. As
we have discussed previously all message publication, service calls, and action
calls in the CLI take in both the message type and data you want to transmit in
YAML format. But what if you don't know the message format, and you don't know a lot about
YAML? The interface show and interface proto commands make this process
easier by respectively telling you first the message type and then the message
format. Recall earlier in the chapter when we called the spawn service on
our turtle simulation. We can use interface show to tell us broadly about the
service and what each of the values mean. We can then use interface proto,
short for prototype, to then generate an empty message that we can fill
out. See the example below:
$ ros2 interface show turtlesim/srv/Spawn
float32 x
float32 y
float32 theta
string name # Optional.  A unique name will be created and returned if this is empty
---
string name
$ ros2 interface proto turtlesim/srv/Spawn
"x: 0.0
y: 0.0
theta: 0.0
name: ''
"
$ ros2 service call /spawn turtlesim/srv/Spawn "{<copy and paste proto here>}"
You can see from the example above how handy these tools can be. It is worth
noting that you need to paste the prototype into a set of quotes and curly
braces for the call to work "{<prototype>}".
ROS 2 Launch
The launch command is used to run ROS launch files. Up until this point we've
been running single ROS programs by hand using the run command, however this
is not how larger ROS systems are generally operated and many robots command
tens if not hundreds of small programs. The ROS launch command is different from
most of the other ROS commands in that it has no sub commands and has a single
function, to start a ROS launch file that executes multiple of programs.
To illustrate this command let's take a look at
its help file.
$ ros2 launch -h
usage: ros2 launch [-h] [-d] [-p | -s] [-a]
                   package_name [launch_file_name]
                   [launch_arguments [launch_arguments ...]]

Run a launch file

positional arguments:
  package_name          Name of the ROS package which contains the launch file
  launch_file_name      Name of the launch file
  launch_arguments      Arguments to the launch file; '<name>:=<value>' (for
                        duplicates, last one wins)

optional arguments:
  -h, --help            show this help message and exit
  -d, --debug           Put the launch system in debug mode, provides more
                        verbose output.
  -p, --print, --print-description
                        Print the launch description to the console without
                        launching it.
  -s, --show-args, --show-arguments
                        Show arguments that may be given to the launch file.
  -a, --show-all-subprocesses-output
                        Show all launched subprocesses' output by overriding
                        their output configuration using the
                        OVERRIDE_LAUNCH_PROCESS_OUTPUT envvar.
Launch files are usually included with a ROS package and are commonly stored in a
launch sub directory. Modern launch files are usually written in Python and end
with the *.launch.py file extension. The launch command has two arguments,
the first one is the package name and then the launch file name. If you are unaware
of the launch files in your package you can use tab completion to list all the
available launch files. Finally, some launch files have arguments that can be
appended to the command. If you are unsure about what a launch file does, or
what arguments it needs, the --print and --show-args commands will tell you
this information. Let's read up on the multisym.launch.py launch file and then
run it following the example below (end the simulation with CTRL-C):
$ ros2 launch turtlesim multisim.launch.py --show-args
Arguments (pass arguments as '<name>:=<value>'):

  No arguments.

$ ros2 launch turtlesim multisim.launch.py --print
<launch.launch_description.LaunchDescription object at 0x7f75aab63828>
├── ExecuteProcess(cmd=[ExecInPkg(pkg='turtlesim', exec='turtlesim_node'), '--ros-args'], cwd=None, env=None, shell=False)
└── ExecuteProcess(cmd=[ExecInPkg(pkg='turtlesim', exec='turtlesim_node'), '--ros-args'], cwd=None, env=None, shell=False)

$ ros2 launch turtlesim multisim.launch.py
[INFO] [launch]: All log files can be found below /home/kscottz/.ros/log/2020-06-24-14-39-03-312667-kscottz-ratnest-20933
[INFO] [launch]: Default logging verbosity is set to INFO
[INFO] [turtlesim_node-1]: process started with pid [20944]
[INFO] [turtlesim_node-2]: process started with pid [20945]
^C[WARNING] [launch]: user interrupted with ctrl-c (SIGINT)
ROS 2 Lifecycle
ROS 2 has a new feature called lifecycle which allows for greater control over
the state of a ROS node. Roughly, this feature allows nodes to have complex
start-up and shut-down procedures that are correctly handed. An example of such
a node would be one that controls a sensor or actuator that needs to perform a
power-on self-test or calibration procedure prior to running. The ROS design
docs
give a great primer on the states and transitions in a lifecycle
node. Let's look at the
lifecycle command to determine what sub commands are available:
$ ros2 lifecycle -h
usage: ros2 lifecycle [-h]
                      Call `ros2 lifecycle <command> -h` for more detailed
                      usage. ...

Various lifecycle related sub-commands

optional arguments:
  -h, --help            show this help message and exit

Commands:
  get    Get lifecycle state for one or more nodes
  list   Output a list of available transitions
  nodes  Output a list of nodes with lifecycle
  set    Trigger lifecycle state transition

  Call `ros2 lifecycle <command> -h` for more detailed usage.
The nodes sub command will list all the lifecycle nodes on a given system.
Once you have listed the nodes, you can list each node's available
transitions using ros2 lifecycle list <nodename>. These transitions are
dictated by the node's current state with some states having more transitions
available than others. If instead of available transitions you wish to query the
current state you can use lifecycle get to return the current state of
your target node. Once you have satisfactorily determined the state of the node
and the available transitions, the lifecycle set command can be used to trigger
the node to transition to a new state. Generally, these CLI commands are used to
diagnose failure modes of systems, or to manually transition a particular
component.
ROS 2 msg (Message)
ROS 2 Eloquent is the last version of ROS to use the msg command. All of the
commands in msg are mirrored in the interface command. These features are
currently deprecated and will be removed in Foxy.
ROS 2 pkg (Package)
The ROS 2 package command is a very useful command to understand what ROS
packages are installed on your system, where they are installed, and the
executables contained within each package. These tools are particularly useful
for understanding an existing robot configuration and finding tools that are
only used on occasion. Let's start by taking a look at the help file for the pkg command:
$ ros2 pkg -h
usage: ros2 pkg [-h] Call `ros2 pkg <command> -h` for more detailed usage. ...

Various package related sub-commands

optional arguments:
  -h, --help            show this help message and exit

Commands:
  create       Create a new ROS2 package
  executables  Output a list of package specific executables
  list         Output a list of available packages
  prefix       Output the prefix path of a package
  xml          Output the XML of the package manifest or a specific tag

  Call `ros2 pkg <command> -h` for more detailed usage.
This command has a variety of sub commands, many of which should look fairly
familiar at this point. The list sub command acts in a manner very similar to
list sub commands we have discussed previously, but this one only lists the
installed system packages. This sub command is often used with grep to help you
find out if a particular package is installed.
Once you have located an installed package you can then have it list the
executables contained by the package using the executables command. This is
much more practical than finding the executables manually. The sub command takes
in a single argument which is the package name. The executables command has a
single optional argument, --full-path, which will output the full path to all
the executable programs. The example below shows how to use these
commands to check the path for all of the turtlesim executables:
$ ros2 pkg list | grep turtle
turtlesim
$ ros2 pkg executables turtlesim --full-path
/opt/ros/eloquent/lib/turtlesim/draw_square
/opt/ros/eloquent/lib/turtlesim/mimic
/opt/ros/eloquent/lib/turtlesim/turtle_teleop_key
/opt/ros/eloquent/lib/turtlesim/turtlesim_node
If you just wanted to know the path to the turtlesim executables you could use
the prefix sub command, which returns the path for a given package's
executables.
Each ROS package contains an XML file that contains metadata for the package,
including information such as the license, maintainer, and its dependencies. ROS
pkg has a handy xml sub command to print these files to the screen, saving you
the hassle of locating and opening the file. You can use grep on the output of
this command to get just the info you need. Below is an example of xml and prefix used to find
the directory of turtlesim, its maintainer, and its license:
$ ros2 pkg prefix turtlesim
/opt/ros/eloquent
$ ros2 pkg xml turtlesim | grep maintainer
  <maintainer email="dthomas@osrfoundation.org">Dirk Thomas</maintainer>
$ ros2 pkg xml turtlesim | grep license
  <license>BSD</license>
kscottz@kscottz-ratnest:~$
The last sub command in the pkg command is create. create is a tool to help
you create a ROS package. We'll use this sub command later in the chapter to
create a new ROS package. The short of it is that you feed the command your
package name and all of the relevant information for your package as optional
arguments.